What do you need to desolder?

Introduction
The introduction to desoldering is an essential aspect of the soldering process. It sets the stage for the entire desoldering procedure and provides a foundational understanding of the tools and techniques required. In this section, we will delve deeper into the significance of desoldering, discuss the challenges it presents, and explore the fundamental principles behind successful desoldering.
Tools and Equipment for Desoldering
Soldering Iron
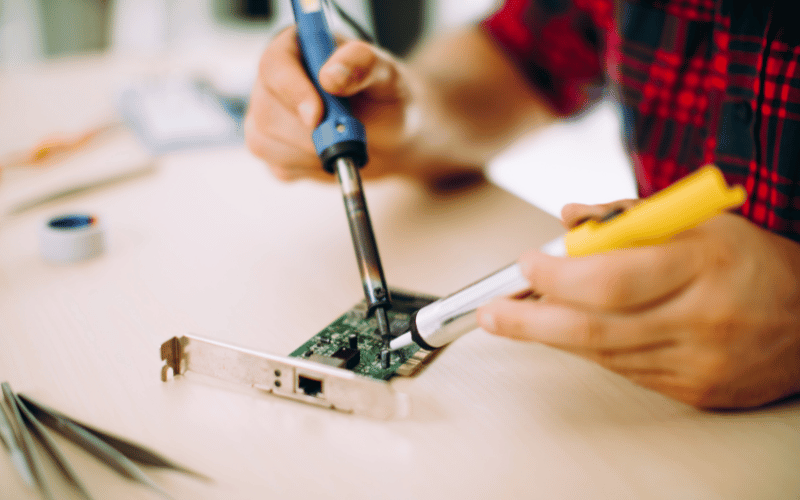
The soldering iron is an essential tool for desoldering electronic components. It is a handheld device that generates heat to melt solder and allows for the removal or attachment of electronic components to a printed circuit board. It consists of a heated metal tip and an insulated handle. When it comes to desoldering, the soldering iron plays a vital role in the precise and controlled application of heat to solder joints, making it possible to remove or replace components without causing damage to the circuit board.
There are different types of soldering irons, each suited for specific desoldering tasks. Selecting the right soldering iron depends on factors such as temperature control, wattage, and the availability of various tips suitable for different desoldering techniques. Let’s delve into the details of what to consider when choosing a soldering iron for desoldering:
- Temperature Control: A good desoldering soldering iron should have precise temperature control to ensure that the heat is applied accurately and consistently to the solder joints. This is essential for preventing damage to the circuit board and components.
- Wattage: The wattage of the soldering iron determines how quickly it can heat and recover temperature. Higher wattage soldering irons are suitable for large joints and ground connections, while lower wattage irons are ideal for smaller, more delicate connections.
- Types of Tips: Soldering irons come with various tip shapes and sizes, each designed for specific desoldering tasks. Conical tips are suitable for precision work, while chisel tips are ideal for larger joints and pads. It’s important to have a selection of tips that cater to different component sizes and types of connections.
Desoldering Pump
A desoldering pump, also known as a solder sucker, is a manual tool used for removing solder from a joint. It features a spring-loaded mechanism that creates a vacuum for sucking up molten solder. This tool is indispensable for efficiently removing excess solder during desoldering tasks, ensuring precision and cleanliness in the process.
Solder Wick or Desoldering Braid
Solder wick, also referred to as desoldering braid, is a fine copper braid designed to absorb and remove solder from connections. It is an effective tool for desoldering components, especially in tight or intricate spaces where a desoldering pump may not reach. Solder wick is an essential accessory that complements the desoldering process by facilitating the removal of excess solder with precision.
Safety Precautions for Desoldering
Eye Protection
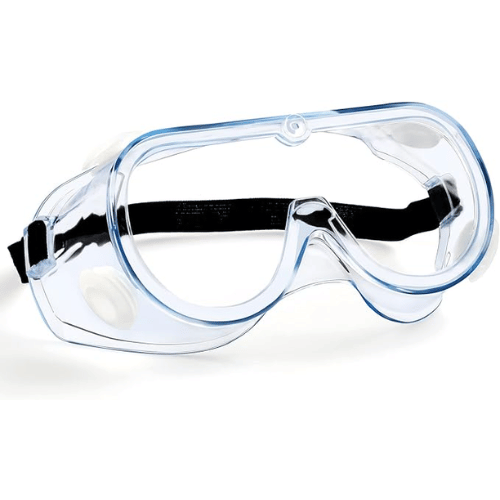
Eye protection is crucial when desoldering to prevent any solder or debris from entering the eyes. It is important to use appropriate eye protection, such as safety goggles or a face shield. These protective gears provide a barrier between the soldering process and the eyes, reducing the risk of eye injuries. When selecting eye protection, ensure that it meets the ANSI Z87.1 standard for safety eyewear.
- Safety Goggles: These form a protective seal around the eyes and are essential for preventing any debris from entering.
- Face Shield: Offers full-face protection and is suitable for tasks that involve significant splatter or large debris.
- Anti-Fog Coating: Some eye protection comes with anti-fog coatings to maintain clear visibility during the desoldering process.
- UV Protection: There are eye protection options that offer UV protection, which is beneficial when working with soldering irons that emit UV light.
Ventilation
Proper ventilation is crucial when desoldering to ensure the safety of the environment and the person performing the task. Here are some key points to consider:
- Use a fume extractor or soldering fume absorber to remove harmful fumes from the air.
- Position the fume extractor near the soldering area to capture the fumes at the source.
- Ensure adequate airflow in the workspace to prevent the accumulation of toxic fumes.
Heat-Resistant Mat
A heat-resistant mat is an essential tool for soldering and desoldering tasks. It provides a safe and stable surface to work on while protecting the underlying area from heat damage. Here are some key points to consider when using a heat-resistant mat:
- Material: Choose a heat-resistant mat made from silicone, fiberglass, or other durable heat-resistant materials. Avoid using flammable or plastic mats that can melt or catch fire.
- Size and Thickness: The mat should be large enough to accommodate your soldering/desoldering setup and thick enough to provide effective insulation against heat transfer.
- Heat Tolerance: Ensure that the mat can withstand high temperatures without deforming or deteriorating. Look for mats with high heat tolerance, typically over 500°F (260°C).
- Anti-Skid Design: Select a mat with an anti-slip or anti-skid surface to prevent components and tools from sliding during work.
Additionally, a heat-resistant mat can serve as a protective barrier for your work surface, whether it’s a workbench, desk, or any other area where soldering/desoldering tasks are performed.
Step-by-Step Guide to Desoldering
Prepare the Area
Desoldering components requires careful preparation of the work area to ensure the process is safe and effective. Here are detailed steps to prepare the area:
- Secure the Circuit Board: Fasten the circuit board in a stable position to prevent movement during desoldering. Use clamps or a dedicated holder to keep the board in place.
- Protect Nearby Components: Shield nearby components from heat damage by using heat-resistant materials such as thermal insulation tape or heat sinks.
- Clear Obstructions: Remove any obstacles that might hinder the desoldering process. This includes excess solder, debris, or any objects that could interfere with access to the solder joints.
- Gather Necessary Tools and Safety Equipment: Ensure all required tools and safety gear are readily accessible. These may include a soldering iron, desoldering pump or braid, flux, safety glasses, and heat-resistant gloves.
Heat the Solder Joint
Using a soldering iron, carefully heat the solder joint of the component you intend to desolder. Apply the tip of the soldering iron to the joint, allowing the solder to reach its molten state. This step prepares the solder for easy removal and disconnection from the circuit board.
Remove the Solder
Once the solder has reached a molten state, use a desoldering pump or solder wick to remove the excess solder from the joint. This step is crucial in the desoldering process, and it requires precision and care to ensure the joint is properly cleaned. Here are the detailed steps to effectively remove the solder:
- Desoldering Pump: Engage the spring-loaded mechanism of the desoldering pump to create a vacuum that extracts the molten solder from the joint. Begin by placing the nozzle of the pump over the molten solder and then release the trigger to suck it up.
- Solder Wick: Alternatively, the solder wick method involves using a copper braid to absorb the excess solder. Position the wick over the joint and apply the soldering iron to transfer the molten solder onto the wick, effectively removing it from the joint.
Inspect the Component
Inspect the Component
After removing the excess solder, inspect the component and the circuit board for successful desoldering. Ensure that the component is free from the board and that the board itself remains undamaged. Clean any residual flux and verify that the desoldered area is ready for rework or component replacement.
Common Mistakes and How to Avoid Them
Applying Too Much Heat
One common mistake during desoldering is applying excessive heat to the solder joint. This can lead to overheating and potential damage to the circuit board and surrounding components. To avoid this, regulate the temperature of the soldering iron and apply heat judiciously to prevent overheating. Here are some additional tips to consider when it comes to applying heat:
- Use a soldering iron with adjustable temperature settings.
- Refer to the specifications of the circuit board to determine the appropriate temperature range for desoldering.
- Consider using heat sinks to protect sensitive components from excessive heat.
Damaging the Circuit Board
Another common mistake to avoid during the desoldering process is causing damage to the circuit board. This can occur due to mishandling the soldering iron, applying excessive force, or improper technique. To prevent this, it’s important to handle the desoldering tools with care and precision.
Not Cleaning the Area After Desoldering
Neglecting to clean the desoldered area can lead to flux residue and solder debris affecting subsequent soldering or rework. It is essential to thoroughly clean the desoldered connection, remove any residual flux, and ensure a clean and pristine surface for future soldering or component replacement.
Conclusion
Mastering the art of desoldering is a valuable skill for anyone working with electronics. By understanding the tools and techniques involved, as well as common mistakes to avoid, you can enhance your proficiency in desoldering electronic components. Remember to prioritize safety, precision, and cleanliness during the desoldering process, and always be attentive to the specific requirements of each desoldering task. With this knowledge, you are well-equipped to tackle desoldering projects with confidence and efficiency.

